Dynamical motor to axis assignment
This feature allows to disable and enable every motor assigned to specified axis (or several axes). Consider situation when we need to control the machine with two heads, each of them is moved by own Z axis motor. In such a case it is possible to modify M6 macro so previous tool was returned to SafeZ on toolchange and then active motors switching performed.
In SwitchMotors(0, 1) function first parameter is index (from zero) of motor which should be disabled. Second parameter is index of motor which should be enabled. So on this command's execution active motor is switched from first to second as they follow in Settings → Motors menu.
if (Is_THC_Mode() or Is_Oxy_Mode()) then
return
end
local toolSlot = GetSelectedToolSlot()
local previousToolSlot = GetToolSlot()
ExecuteMDI("G53 G0 Z0")
if (toolSlot == 2) then
SwitchMotors(0,1)
else
SwitchMotors(1,0)
end
local delta = 200 -- distance between two heads
if (toolSlot == 2 and toolSlot ~= previousToolSlot) then
local CurrX = AxisGetPos(Axis.X)
local CurrY = AxisGetPos(Axis.Y)
local NewY = CurrY - delta
ExecuteMDI("G55")
ExecuteMDI("G10L20P0 X"..str(CurrX).." Y"..str(NewY))
ExecuteMDI("G90 G0 Y"..str(CurrY))
elseif (previousToolSlot == 2 and toolSlot ~= previousToolSlot) then
local CurrX = AxisGetPos(Axis.X)
local CurrY = AxisGetPos(Axis.Y)
local NewY = CurrY + delta
ExecuteMDI("G54")
ExecuteMDI("G10L20P0 X"..str(CurrX).." Y"..str(NewY))
ExecuteMDI("G90 G0 Y"..str(CurrY))
end
SetToolSlot(toolSlot)
end
When work with second tool is finished we can switch to using first head by M6T1 command which calls SwitchMotors(1,0) function. Machine position on Z axis will be automatically restored to value it had when first motor was active.
To control disabling/enabling every motor separately MotorDisable and MotorEnable functions can be used which accept one parameter - motor index.
To make full use of this option:
- Purchase and activate option, apply license in PUMOTIX (How Do I Apply a Licence?).
- Setup multiple motors on one axis (more about motor setup). The function can be applied to any number of axes.

- Modify or write a new macro.
- Use a macro to switch between motors. You can use the line for entering the G-code, a button on the macro panel or a specialized interface button to do this.
- Monitor the system status in the Diagnostics tab where you can see all the motors you have configured.

Also a button will become available to turn on all configured motors on the diagnostics tab when the option is active.
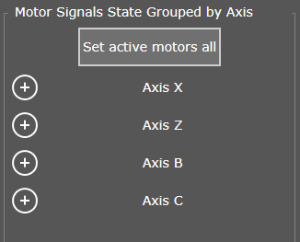
Button "Set active motors all"